Damaged walls are a common issue in every home—whether it’s small nail holes, cracks, or accidental dents. The good news? You don’t need to hire a professional to fix them. With the right tools and techniques, anyone can restore walls to a like-new condition.
In this guide, we’ll walk you through how to repair drywall, the best materials to use, and how to achieve a seamless finish—perfect for homeowners, renters, and DIY enthusiasts.
1. Why Drywall Gets Damaged
Before diving into repairs, it helps to understand the most common causes of wall damage:
- Nail holes from hanging pictures or shelves
- Hairline cracks from natural house settling
- Scratches or dents from furniture
- Peeling or chipped surfaces
- Kids’ drawings or accidental marks
These issues may seem minor, but they can affect the overall look of your home. Fortunately, they’re easy to fix with a proper drywall repair kit.
2. Essential Tools for Drywall Repair
To achieve a professional-looking result, you’ll need:
- Wall putty or spackling compound
- Drywall patches or repair tape
- Scraper or putty knife
- Sandpaper or sanding sponge
- Cleaning cloth
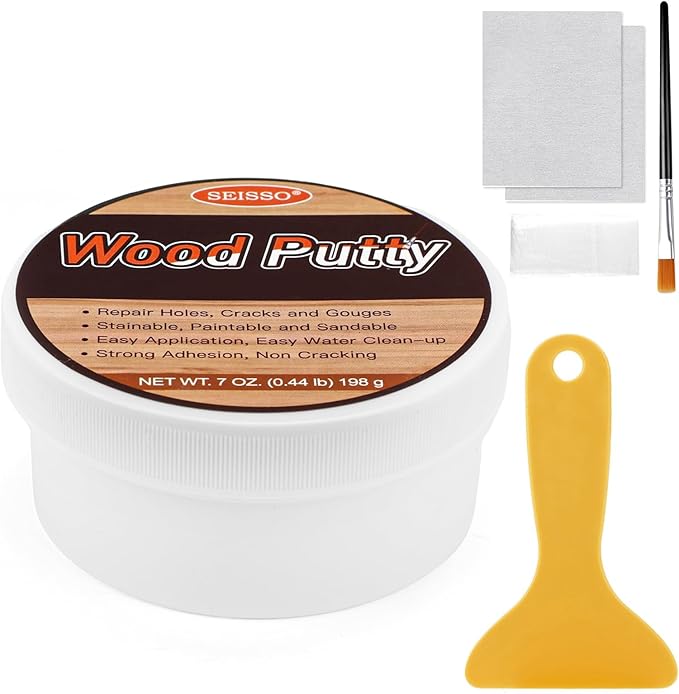
Instead of buying everything separately, using an all-in-one solution like the SEISSO Drywall Repair Kit can save time and ensure you have all the necessary tools in one package.
3. Step-by-Step Guide: How to Repair Drywall
1). Clean the Damaged Area
- Start by removing dust, loose debris, or peeling paint. A clean surface ensures better adhesion.
2). Choose the Right Repair Method
- Small holes or scratches: Fill directly with wall putty
- Larger cracks or holes: Apply a patch or repair tape first
3). Apply the Repair Compound
- Use a scraper to spread the wall putty evenly over the damaged area. Make sure it’s smooth and level with the surrounding wall.
4). Let It Dry Completely
- Drying time may vary depending on the thickness of the application.
5). Sand for a Smooth Finish
- Once dry, gently sand the area until it blends seamlessly with the wall.
6). Repeat if Necessary
- For deeper damage, apply a second layer and sand again.
4. Pro Tips for a Perfect Wall Repair
- Always apply thin layers for better results
- Use fine-grit sandpaper for a smoother finish
- Match paint color after repair for a flawless look
- Avoid over-sanding to prevent uneven surfaces
- Common Wall Problems You Can Fix
With the right tools, you can easily repair:
- Nail holes
- Wall cracks
- Dents and scratches
- Small grooves or chips
- Minor surface damage
A reliable wall repair patch kit makes all of these fixes simple—even for beginners.
5. Why Choose an All-in-One Drywall Repair Kit?
Using a complete kit simplifies the process, especially if you’re new to DIY repairs. A well-designed kit includes everything needed for different repair scenarios—saving you time and effort.
The SEISSO Drywall Repair Kit is a great example. It comes with wall putty, repair patches, tape, sanding tools, and more—making it suitable for both small touch-ups and larger repairs. The formula is safe, easy to use, and dries to a natural white finish that blends seamlessly with your wall.
Learning how to repair drywall is a valuable skill that can save you money and keep your home looking fresh. Whether you’re fixing a small nail hole or a larger crack, the process is straightforward with the right approach.
If you’re looking for a convenient and beginner-friendly solution, consider using a complete drywall repair kit to make the job faster and easier.