Beschädigte Wände können selbst das sauberste Zuhause unfertig aussehen lassen. Von Nagellöchern und Rissen bis hin zu Kratzern und Graffiti sind Wandunvollkommenheiten ein häufiges Problem in jedem Haushalt.
Die gute Nachricht? Sie brauchen keine teuren Reparaturen oder professionelle Hilfe. Mit den richtigen Werkzeugen und einem einfachen Verfahren können Sie die meisten Wandschäden selbst beheben.
In diesem Leitfaden erfahren Sie, wie Sie Risse, Löcher und Kratzer in Wänden einfach reparieren können, und entdecken eine praktische Lösung mit einem Trockenbau-Reparaturset.
1. Häufige Arten von Wandschäden
Bevor Sie mit einer Reparatur beginnen, ist es wichtig, das Problem zu identifizieren:
- Nagellöcher vom Aufhängen von Bildern
- Risse durch Setzen oder Stöße
- Kratzer und Dellen von Möbeln oder täglichem Gebrauch
- Graffiti oder Flecken auf gestrichenen Wänden
Jede Art von Beschädigung kann mit der richtigen Kombination aus Wandspachtel, Flicken und Reparaturwerkzeugen behoben werden.
2. Was Sie für die Wandreparatur benötigen
Um ein glattes und professionelles Finish zu erzielen, benötigen Sie typischerweise:
- Wandreparaturpaste (Spachtelmasse)
- Trockenbau-Reparaturflicken
- Spachtel oder Applikator
- Schleifpapier zum Glätten
Anstatt diese einzeln zu kaufen, vereinfacht ein All-in-One-Trockenbau-Reparaturset den Prozess und spart Zeit.
3. Schritt-für-Schritt: So reparieren Sie Ihre Wand
1). Oberfläche reinigen
Wischen Sie den beschädigten Bereich ab, um Staub und Schmutz zu entfernen. Dies hilft den Reparaturmaterialien, richtig zu haften.
2). Kleine Löcher & Kratzer reparieren
Für kleinere Schäden:
- Tragen Sie die Wandreparaturpaste direkt auf
- Verwenden Sie einen Spachtel, um sie gleichmäßig zu glätten
- Lassen Sie sie vollständig trocknen
3). Größere Risse oder Löcher reparieren
Für größere Schäden:
- Bringen Sie einen Reparaturflicken oder Klebeband über dem Riss an
- Drücken Sie ihn fest an die Wand
- Decken Sie ihn mit Wandspachtel ab
- Glätten Sie die Oberfläche mit einem Spachtel
4). Trocknen lassen & glatt schleifen
Nach dem Trocknen schleifen Sie den Bereich leicht ab, um ein nahtloses Finish zu erzielen.
Falls erforderlich, tragen Sie eine zweite Schicht Spachtel auf und wiederholen Sie den Vorgang.
4. Warum ein Trockenbau-Reparaturset verwenden?
Die Verwendung eines kompletten Wandreparatursets bietet mehrere Vorteile:
- ✔ Komfort – alle Werkzeuge in einer Box enthalten
- ✔ Anfängerfreundlich – keine professionellen Kenntnisse erforderlich
- ✔ Kostengünstig – vermeidet teure Reparaturdienste
- ✔ Vielseitige Anwendung – funktioniert bei verschiedenen Wandschäden
Das SEISSO Trockenbau-Reparaturset wurde entwickelt, um die Wandreparatur einfach, effizient und für jedermann zugänglich zu machen.
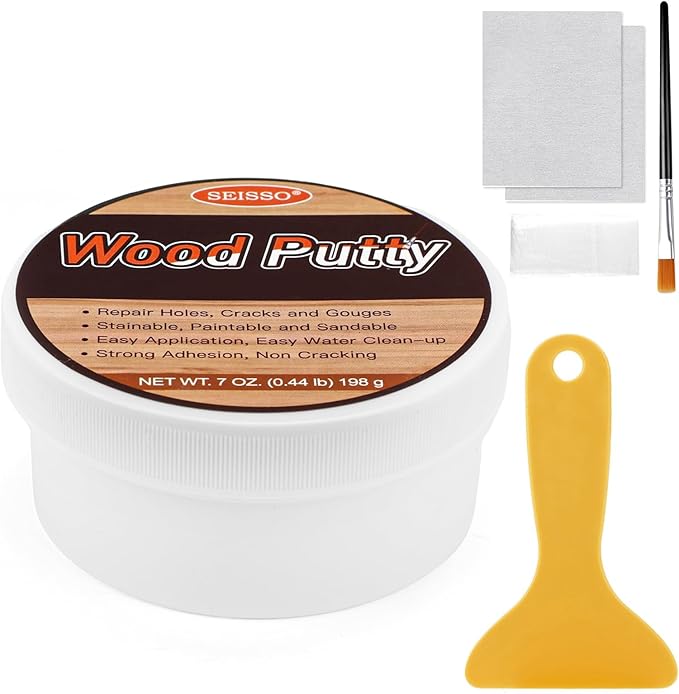
5. Hauptmerkmale des SEISSO Trockenbau-Reparatursets
- Komplettes Werkzeugset: inklusive Spachtelmasse, Flicken, Klebeband, Spachtel, Schleifpapier und mehr
- Breite Anwendung: geeignet für Risse, Löcher, Kratzer und Flecken
- Glatte Oberfläche: fügt sich natürlich in weiße Wände ein
- Sichere Materialien: für den täglichen Gebrauch im Haushalt geeignet
- Einfache Bedienung: perfekt für DIY-Anfänger
Dies macht es zu einer idealen Lösung für schnelle Reparaturen und die Hausinstandhaltung.
6. Wo können Sie es verwenden?
Ein Trockenbau-Reparaturset ist perfekt für:
- Wohnzimmer und Schlafzimmer
- Flure und Bürowände
- Mietwohnungen (vor dem Auszug)
- DIY-Heimwerkerprojekte
Ob es sich um eine kleine Ausbesserung oder eine größere Reparatur handelt, die richtigen Werkzeuge machen den Unterschied.
7. Häufige Fehler, die vermieden werden sollten
Um die besten Ergebnisse zu erzielen, vermeiden Sie diese häufigen Fehler:
- Zu viel Spachtelmasse auf einmal auftragen
- Das Reinigen der Oberfläche überspringen
- Nicht genügend Trocknungszeit einplanen
- Vergessen, für ein glattes Finish zu schleifen
Wenn Sie sich Zeit nehmen, erhalten Sie ein saubereres, professionelleres Ergebnis.
8. Eine einfache Möglichkeit, Ihre Wände zu restaurieren
Wandschäden müssen nicht dauerhaft sein. Mit einem einfachen DIY-Ansatz und den richtigen Werkzeugen können Sie Ihre Wände schnell und einfach restaurieren.
Wenn Sie eine komplette und einfach zu bedienende Lösung suchen, bietet das SEISSO Wandreparaturset alles, was Sie brauchen, um Wandunvollkommenheiten zu beheben und Ihrem Raum neues Leben einzuhauchen.
Saubere und glatte Wände verbessern das Gesamtbild Ihres Zuhauses. Anstatt mit Rissen zu leben oder Fachleute zu beauftragen, können Sie mit einem einfachen Reparaturset selbst die Kontrolle übernehmen.
Mit der richtigen Methode und einer zuverlässigen Trockenbau-Reparaturlösung ist ein makelloses Wandfinish einfacher als je zuvor.