One of the biggest challenges in wood furniture repair isn’t fixing the damage—it’s matching the color correctly.
You can fill a scratch or crack easily, but if the color doesn’t blend in, the repair becomes obvious. That’s why many DIY attempts fail.
In this guide, you’ll learn how to repair wood furniture and match colors like a pro, using the right techniques and tools.
1. Why Color Matching Matters in Wood Repair
Wood surfaces come in a wide range of tones—from light maple to deep walnut.
Common problems include:
- Repairs that look too light or too dark
- Uneven finishes after drying
- Visible patches that don’t blend
To achieve a natural look, you need a wood furniture repair kit with multiple colors and the ability to mix them.
2. What You Need for Professional Results
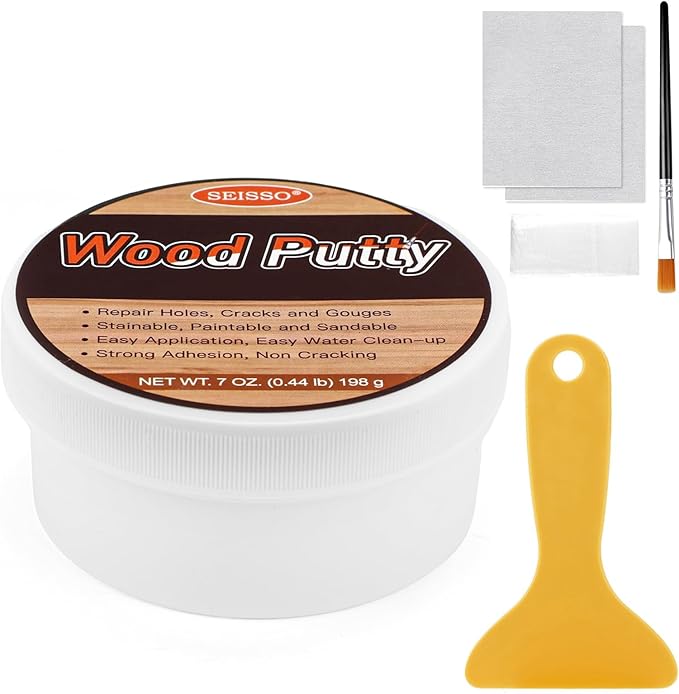
A complete wood repair kit for furniture and floors should include:
- Multiple color fillers
- Brushes for detailed touch-up
- Scrapers for smoothing
- A color mixing guide
For example, the SEISSO Wood Furniture Repair Kit (24 Colors, 50pcs) provides a wide palette of shades, making it easier to match almost any wood tone.
3. Step-by-Step: How to Repair and Match Wood Color
1). Identify the Base Color
Before repairing:
- Observe the main tone of your furniture
- Is it warm (yellow/red) or cool (gray/ash)?
- Choose the closest base color as your starting point
This step is crucial for accurate wood color matching.
2). Start with a Lighter Shade
When mixing colors:
- Always begin with a lighter color
- Gradually add darker tones
- Mix in small amounts
This method gives you better control and prevents over-darkening.
3). Test Before Applying
Never apply directly without testing.
- Try the color on a hidden area
- Let it dry (color may change slightly)
- Adjust if needed
This ensures your wood filler repair blends seamlessly.
4). Fill Scratches, Cracks & Holes
Once your color is ready:
- Squeeze filler into the damaged area
- Use a scraper to smooth the surface
- Remove excess material
For deeper damage, apply in layers for better results.
5). Add Final Touch-Up Details
For a natural finish:
- Use a brush to recreate wood grain
- Blend edges carefully
- Let it dry completely
This step helps your repair look almost invisible.
3. Common Wood Damage You Can Fix
With a versatile wood furniture touch up kit, you can repair:
- Surface scratches
- Cracks and splits
- Holes and dents
- Discoloration and fading
- Edge and corner damage
It works on:
- Wooden floors
- Cabinets and wardrobes
- Tables and desks
- Doors and frames
4. Why More Colors = Better Results
Many basic kits fail because they offer limited color options.
A kit with 24 colors allows you to:
- Match rare or complex tones
- Adjust for lighting differences
- Blend multiple shades for realism
This is especially important for high-end furniture where precision matters.
5. A Practical DIY Solution
If you want a more flexible and professional approach, the SEISSO Wood Furniture Repair Kit (24 Colors, 50pcs) is designed to handle complex repairs.
Key advantages:
- 24 common wood colors for accurate matching
- Includes brushes, scrapers, and tools
- Supports custom color mixing
- Suitable for both minor and major repairs
- Easy for beginners, effective for advanced users
It’s a complete wood scratch repair kit for restoring furniture and floors at home.
6. Pro Tips for Flawless Results
- Work in natural lighting for better color accuracy
- Mix small batches to avoid waste
- Apply thin layers instead of thick ones
- Always allow proper drying time
These techniques can elevate your DIY repair to a professional level.
Wood damage is inevitable—but visible repairs don’t have to be.
With the right wood repair kit and color matching technique, you can restore scratches, cracks, and wear so naturally that they’re almost impossible to notice.
If you’re looking for a complete and flexible solution, the SEISSO Wood Furniture Repair Kit offers the tools and color range needed for precise, professional-looking repairs at home.