
Inspect a used piece in daylight, separate surface marks from loose parts, and use a small test to choose a suitable cosmetic repair.
Inspect the piece before deciding what to repair
Look at the furniture from normal viewing distance and then from several angles in daylight. Photograph the top, corners, legs, and any marks that stand out. A shallow line may disappear from the front of a desk but become visible under a window. Make a short list of the marks that actually affect the way you want to use or display the piece.
Open drawers and doors gently and check whether they move as expected. Look for missing hardware, loose joints, or a part that no longer sits in line with the rest of the furniture. If the piece shifts during this inspection, leave it unloaded and ask about its condition before you buy it or start a surface repair.
Identify the surface you will be working on
Look at an exposed underside, the back edge, or another unfinished area where the construction is visible. A decorative veneer can be thin, and an applied surface can resemble wood from across the room. Ask the seller for the maker or material information if it is available. Keep photographs of those details with the purchase record.
Check whether the top already has a coating, polish, or earlier touch-up. Differences in sheen may become clearer when you look across the surface from the side. Plan your test on a discreet part of the same finish. A bare underside may help identify the construction, while a finished hidden edge gives you a better place to judge color and adhesion.
Separate the jobs that need different tools
A thin surface scratch, a shallow chip with missing material, and a loose connection require different responses. Mark these separately on your photos. An area of missing finish may benefit from a localized color touch-up after testing. A small recessed chip may need a compatible filler. Pay attention to a mark that grows or moves when the furniture is handled.
Loose legs, lifting veneer, and moving joints need their own assessment before cosmetic work. Ask a furniture repair professional about instability or extensive damage. While you are sorting the list, check what can wait. A desk may need a steady base and a working drawer before a faint mark on the back edge merits attention.
Clear a place to work and test the cleaning method
Choose a supported work surface with enough light to inspect the mark. Remove loose dust using the furniture maker’s approved method if you can identify it. Test any permitted cleaner in a hidden area and let the surface dry as directed. Some marks change substantially once grime is lifted, which can change whether a touch-up is needed.
Ask for advice before using abrasives or solvents on an unfamiliar finish, especially on an old piece with a coating you cannot identify. Follow the kit and furniture care directions for preparation and protection. Keep clean applicators together and make a place to set the part or drawer while you inspect it, so a repaired surface can remain undisturbed.
Choose a tool for one small area first
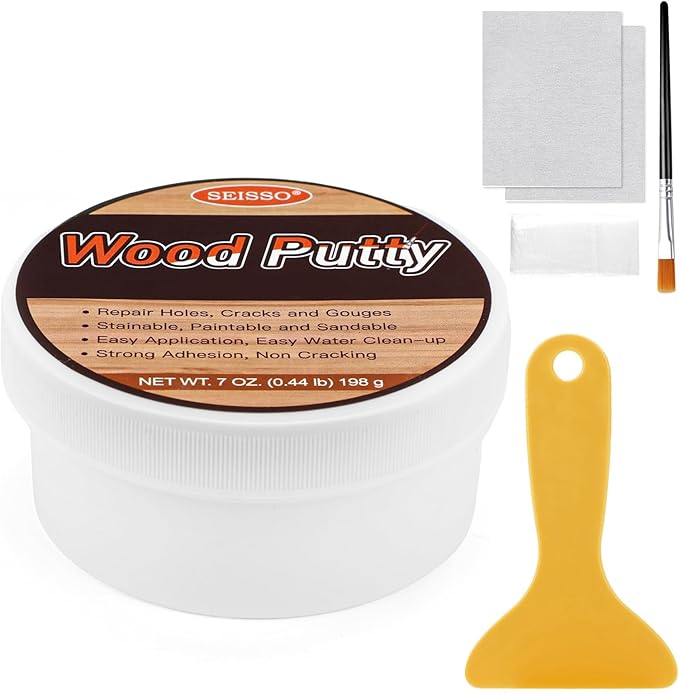
The current SEISSO 39-piece kit listing describes wood fillers, touch-up markers, putty, wax, and application tools. Lay the items out and check the instructions to see which options are suitable for the surface and mark you identified. Keep the tools for cleaning, applying color, and removing excess separate so you can follow the stated sequence.
For a mark that needs color, compare the proposed shade against the surrounding finish and try a small sample as directed. For a chip with missing material, check whether the filler suits the substrate and depth before applying it. Start with one discreet repair, keep the product within the intended area, and allow the stated drying or curing period before judging it.
Use the dried sample to set the scope
Look at the finished test under the room’s usual light as well as indirect daylight. Check the color, sheen, and the height of the repaired area. A patch that looks close while wet may stand out after drying, and a raised spot can catch the light. View it from the direction you will normally see the furniture.
Write down the tool, color, and application method that gave the result. If the sample changes the finish unexpectedly, stop and ask about the material before doing more. When the test looks suitable, use it to decide which nearby marks are worth treating. Work on a small area at a time so you can check progress without spreading color over sound finish.
Let the repaired area settle before moving the piece
Follow the kit’s instructions for drying, finishing, and return to use. Keep objects, packing material, and hands away from the test area during that period. Inspect the result before putting a lamp, mat, or stack of books on the repaired surface. If you are restoring a drawer front, check the position of its hardware before refitting it.
Record how the piece should be carried and supported. If it has a loose leg, damaged base, or moving veneer, resolve that issue before moving it into regular use. Check the surface after transport or reassembly. A photo taken before work is useful when deciding whether a faint line is part of the original finish or a new mark.
Keep a record with the furniture
Save the model if you find it, the photographs, and the method you used on the test area. Label any leftover product by its original name and color and store it as directed. A simple record helps you recognize the finish later and choose the same approach for a comparable cosmetic mark.
Review the current SEISSO kit listing when you need to confirm the included colors and tools. Base your choice on the condition and material of the piece and the work you intend to do. For the first repair, pick an area small enough to observe closely, then check it again under everyday lighting before deciding what comes next.
Frequently Asked Questions
Where should I test a wood repair color?
Choose a discreet area with the same finish as the visible mark, and follow the repair product’s test and drying instructions.
Can I use cosmetic filler near a loose table leg?
Have the loose connection assessed first. Choose a surface product only after the furniture is stable and the intended repair is clear.
What if I cannot tell whether a table has veneer?
Check the maker information and examine an exposed edge or underside. Ask a repair specialist to identify the surface before sanding or applying a product.
How should I decide which scratches to repair?
Look from the angles and lighting you use every day. Start with a small visible mark you can assess using a discreet test of the same finish.
Product details: SEISSO Wood Furniture Repair Kit 39 Sets-12 Colors Wood Fillers with Fillers & Markers