Damaged walls are one of the most common household issues—whether it’s nail holes, accidental dents, peeling paint, or cracks. The good news? You don’t need expensive contractors or advanced skills to restore your walls.
With the right drywall repair kit, you can achieve professional-looking results in just a few simple steps.
1. Why Wall Damage Happens (And Why You Should Fix It Quickly)
Walls take more wear and tear than we think. Common causes include:
- Hanging pictures or shelves (nail holes)
- Moving furniture (scratches and dents)
- Moisture or temperature changes (cracks)
- Kids, pets, or everyday accidents (scuffs and graffiti)
Ignoring these issues can lead to bigger problems like paint peeling, moisture damage, or structural weakening.
👉 That’s why using a reliable wall repair patch kit early can save both time and money.
2. The DIY Advantage: Save Money & Time
Hiring a professional for minor wall repairs can cost anywhere from $50 to $200 per visit. But most small to medium wall damage can be fixed at home using a spackle wall repair kit.
Benefits of DIY wall repair:
- ✔ No waiting for appointments
- ✔ Budget-friendly solution
- ✔ Full control over results
- ✔ Great for renters before moving out
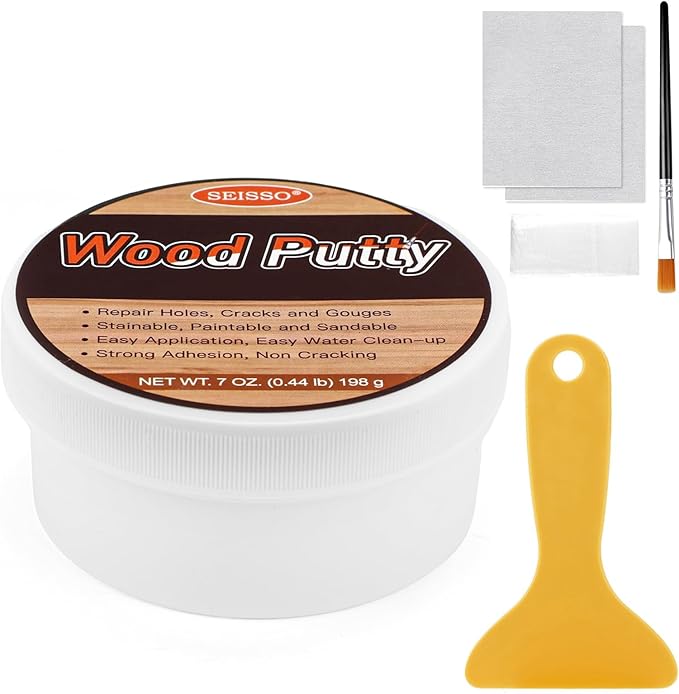
A complete kit like the SEISSO Drywall Repair Kit makes the process even easier by including all essential tools in one box.
3. What You Need for a Perfect Wall Repair
A high-quality drywall hole repair kit should include:
- Wall repair paste (spackle)
- Self-adhesive wall patches
- Scraper for smoothing
- Sandpaper for finishing
The SEISSO drywall repair kit provides all of these, making it ideal for beginners and experienced DIYers alike.
4. Step-by-Step: How to Repair Wall Holes
1). Clean the Damaged Area
Remove dust and loose debris to ensure proper adhesion.
2). Apply the Patch (For Larger Holes)
Use a self-adhesive drywall patch to cover cracks or holes.
3). Apply Wall Repair Paste
Spread the wall mending agent evenly using a scraper.
4). Let It Dry
Most modern formulas are quick-dry wall repair compounds, drying in about 4 hours depending on conditions.
5). Sand and Finish
Smooth the surface with sandpaper for a seamless look.
5. Pro Tips for a Seamless Finish
- Apply thin layers instead of one thick coat
- Let each layer dry fully before sanding
- Use fine sandpaper for a smooth texture
- Wipe off dust before painting
These simple techniques can make your repair nearly invisible.
6. Choosing the Right Drywall Repair Kit
Not all kits are created equal. When selecting a best drywall repair kit, look for:
- ✔ Strong adhesion
- ✔ Quick drying time
- ✔ Smooth finish capability
- ✔ Safe, non-toxic ingredients
- ✔ Complete tool set
The SEISSO wall repair kit checks all these boxes, making it a practical choice for everyday home repairs.
7. Perfect for Renters, Homeowners & DIY Lovers
Whether you're preparing to move out, refreshing your home, or fixing small imperfections, a wall hole filler kit is an essential tool.
Especially for renters, repairing wall damage can help:
- Avoid deposit deductions
- Keep walls looking clean and new
- Maintain a good landlord relationship
8. Small Fixes, Big Impact
Wall imperfections may seem minor, but fixing them can instantly improve the look and feel of your space.
Instead of delaying repairs or spending on professionals, a reliable drywall repair solution lets you take control with confidence.
✨ With an all-in-one option like the SEISSO Drywall Repair Kit, achieving smooth, flawless walls has never been easier.